used rv inspection checklist pdf
Ensure your used RV is in top shape with our free, easy-to-use inspection checklist. Cover all essential areas before purchase.
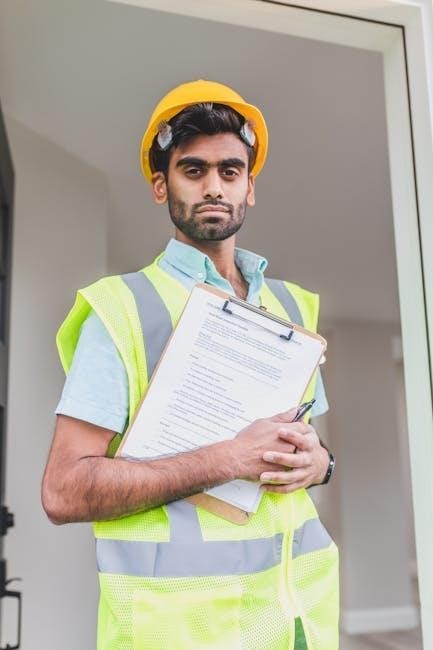
A used RV inspection checklist is essential for ensuring a smooth and informed purchase. It helps identify potential issues, from tire condition to plumbing and electrical systems, ensuring safety and reliability. By following a detailed checklist, buyers can avoid costly surprises and make confident decisions. Always prioritize thorough inspections to safeguard your investment and enjoy a hassle-free RV experience.

Why a Used RV Inspection Checklist is Essential
A used RV inspection checklist is vital for ensuring a smooth and confident purchase. It helps buyers identify potential issues early, avoiding costly surprises. By systematically evaluating the exterior, interior, and mechanical systems, buyers can assess the RV’s condition accurately. This process ensures safety, reliability, and long-term satisfaction. A thorough inspection also provides leverage for negotiations and helps prioritize repairs. Skipping this step can lead to hidden problems, financial losses, and dissatisfaction. A checklist ensures no critical areas are overlooked, making it an indispensable tool for anyone considering a pre-owned RV purchase.
Overview of the Inspection Process
The inspection process for a used RV involves a systematic approach to evaluate its condition. It begins with an exterior check, assessing the roof, windows, tires, and paint for damage or wear. Inside, the focus shifts to the interior, including appliances, plumbing, and electrical systems; A thorough review of mechanical components like the engine, brakes, and suspension is also crucial. Test drives are essential to gauge performance and identify potential issues. The process concludes with a detailed review of findings, helping buyers make informed decisions. A well-structured inspection ensures no critical areas are overlooked, providing clarity on the RV’s condition and value. This step-by-step evaluation is key to a successful purchase.
Understanding the Importance of a Pre-Purchase Inspection
A pre-purchase inspection is vital for uncovering hidden issues in a used RV. It ensures a smooth buying process by identifying potential problems early, saving time and money. This step guarantees safety and reliability, making it a cornerstone of a successful RV purchase.
What is a Pre-Purchase Inspection?
A pre-purchase inspection is a detailed evaluation of a used RV conducted before finalizing the purchase; It involves a thorough examination of all systems, including exterior, interior, mechanical, and electrical components. This process helps identify any hidden issues, such as water damage, plumbing leaks, or mechanical faults, ensuring the RV is in good condition. The inspection is typically performed by a qualified RV technician or mechanic, who provides a detailed report outlining findings and recommendations. Unlike a dealer’s pre-delivery inspection (PDI), a pre-purchase inspection is tailored to the buyer’s needs, offering transparency and peace of mind. It’s a critical step in avoiding costly surprises and ensuring the RV is safe and functional. By addressing potential problems upfront, buyers can negotiate better prices or avoid unsuitable purchases. This inspection is essential for making an informed decision.
Benefits of a Thorough Inspection
A thorough inspection offers numerous benefits for used RV buyers. It identifies hidden issues, such as water damage or electrical faults, preventing costly surprises. By addressing problems early, buyers can negotiate better prices or avoid unreliable units. The inspection also ensures safety, as it checks critical systems like brakes and propane. It provides peace of mind, knowing the RV is functional and secure. Additionally, a detailed report helps prioritize repairs, aiding in budget planning. This process fosters confidence in the purchase, ensuring the RV meets expectations. A thorough inspection is a wise investment, safeguarding both financial and personal well-being. It’s a crucial step in making an informed decision and enjoying a hassle-free RV experience. The benefits far outweigh the initial cost, making it an essential part of the buying process. Always opt for a professional inspection to maximize these advantages.
Consequences of Skipping an Inspection
Skip an inspection, and you risk uncovering costly surprises down the road. Hidden issues like water damage, electrical faults, or mechanical failures can lead to unexpected repair bills and safety hazards. Without a thorough check, you might inherit problems that could have been identified earlier, leading to financial strain. Overlooked defects in systems like plumbing, brakes, or propane can escalate into major repairs, compromising the RV’s reliability. Additionally, undetected structural damage or mold growth can pose serious health risks. Skipping an inspection also leaves you vulnerable to legal or financial repercussions if issues arise after purchase. It’s a gamble that can turn an exciting purchase into a regrettable decision. Always prioritize a detailed inspection to avoid these pitfalls and ensure a secure, enjoyable RV ownership experience. The consequences of skipping this crucial step far outweigh the initial cost of the inspection.

Essential Components of a Used RV Inspection Checklist
A comprehensive checklist ensures a thorough evaluation of the RV’s exterior, interior, mechanical systems, plumbing, electrical components, appliances, roof, tires, chassis, batteries, propane, brakes, suspension, and exhaust systems.
Exterior Inspection
The exterior inspection is a critical part of evaluating a used RV. Start by examining the overall condition of the paint and decals for fading, peeling, or damage. Check for dents or rust on the body panels and undercarriage, as these can indicate past collisions or water damage. Inspect the roof for cracks or soft spots, which may lead to leaks. All windows and mirrors should be free of cracks or discoloration. Look for any signs of sealant failure around doors, windows, and seams. Tire condition is another key area—check tread depth and look for uneven wear or bulges. Lastly, test all exterior lights and ensure they are functioning properly. A thorough exterior inspection helps identify potential issues before they escalate, ensuring your RV remains durable and roadworthy.
Interior Inspection
An interior inspection is vital to assess the living condition and functionality of the RV. Begin by examining the walls, floors, and ceilings for water damage, stains, or signs of wear. Check all cabinets and drawers for proper alignment and functionality. Inspect the condition of furniture, upholstery, and countertops for tears, cracks, or excessive wear. Test all interior lighting, switches, and outlets to ensure they are working correctly. Look for any musty odors that may indicate mold or mildew. Additionally, evaluate the condition of the bathroom, including the shower, sink, and toilet, for any leaks or damage. Finally, test the HVAC system to ensure it heats and cools evenly. A thorough interior inspection helps you understand the comfort and usability of the RV’s living spaces, ensuring they meet your needs and expectations.
Mechanical Systems Check
A thorough mechanical systems check is critical to ensure the RV’s engine, transmission, and other components are in good working condition. Start by inspecting the engine for leaks, worn belts, or corrosion. Check the oil and coolant levels and look for any signs of overheating. Test the transmission by shifting through all gears to ensure smooth operation. Inspect the brake system, including the pads, rotors, and fluid levels, for any signs of wear or damage. Examine the suspension and steering components for alignment issues or excessive play. Finally, test the exhaust system for leaks or damage, as this can lead to safety hazards. A well-maintained mechanical system ensures reliability and safety on the road, making this inspection a cornerstone of your used RV evaluation process.

Plumbing and Water Systems
Inspecting the plumbing and water systems is vital to ensure functionality and prevent costly repairs. Begin by checking for leaks under sinks, around faucets, and near water hoses. Test the water pump to ensure it operates smoothly and check water pressure. Inspect the water heater for rust, leaks, or damage, and verify its temperature settings. Examine the freshwater tank, greywater, and blackwater systems for cracks or blockages. Check all drain valves to ensure they open and close properly. Look for signs of water damage or mineral buildup, which can indicate deeper issues. Finally, test the propane system if applicable, as it often powers water heaters. A thorough plumbing inspection ensures a reliable water supply and waste management system, essential for a comfortable RV experience. Addressing these issues early can save time and money down the road.
Electrical Systems Review
A comprehensive review of the electrical systems ensures safety and functionality. Start by inspecting the battery, checking its age, charge level, and connections for corrosion. Test all circuit breakers to ensure they reset properly and verify the condition of the power cord and plug. Check for any frayed wires or damaged insulation, which can pose fire hazards. Inspect the electrical panel and ensure all fuses are intact. Test all outlets and switches to confirm they are functioning correctly. Look for any signs of overloaded circuits or blown fuses. Additionally, check the operation of lights, appliances, and electronic devices to ensure they work as intended. A thorough electrical inspection helps prevent potential hazards and ensures reliable power distribution throughout the RV, making it safe for use and enjoyment on the road.
Appliances and Appliances
Inspecting the appliances is crucial to ensure they are in proper working condition. Start by checking the refrigerator, stove, oven, and microwave for functionality. Verify that all appliances are clean and free from damage. Test the propane system to ensure it operates safely and efficiently. Check the electrical connections and water lines connected to appliances for leaks or corrosion. Inspect the ventilation systems, such as range hoods and fans, to ensure they are clear and functioning properly. Look for any signs of wear or needed repairs, such as cracked seals or faulty ignitors. Additionally, test each appliance under load to ensure they perform as expected. A thorough inspection of the appliances helps ensure comfort and convenience during your RV adventures, making it essential to address any issues before finalizing the purchase.
Roof and Window Inspection
Inspecting the roof and windows is vital to ensure weather-tightness and structural integrity. Start by examining the roof for cracks, tears, or damaged seals around vents and skylights. Check for any signs of water damage or leaks, including discoloration or soft spots. Ensure all roof vents and fans are securely fastened and functioning properly. Next, inspect the windows for cracks, fogging, or worn-out seals. Test each window to ensure they open, close, and lock securely. Look for any gaps or damage around window frames that could allow air or water intrusion. Additionally, verify that all window screens are in good condition. A thorough roof and window inspection helps prevent costly repairs and ensures a comfortable living space during your travels. Addressing these issues early can save time and money in the long run.
Tires and Wheels Condition
Evaluating the tires and wheels is critical for safety and performance. Check tread depth using a tread gauge to ensure it meets safety standards, and look for uneven wear, cracks, or bulges. Inspect the sidewalls for damage or signs of aging. Verify that all tires, including the spare, are in good condition and match the vehicle’s specifications. Check the tire pressure and compare it to the recommended levels in the owner’s manual. Examine the wheels for rust, dents, or loose lug nuts. Ensure the hubcaps are secure and the rims are undamaged. Test the brakes to ensure proper function and look for any fluid leaks near the wheels. A thorough inspection helps prevent blowouts and ensures a smooth, safe ride. Neglecting this step could lead to dangerous situations on the road, making it a top priority in your RV inspection checklist.
Frame and Chassis Condition
The frame and chassis are the foundation of the RV, ensuring structural integrity and safety. Inspect for rust, corrosion, or damage that could weaken the structure. Check for any signs of repairs or welding, which may indicate past issues. Look for alignment problems, as misalignment can lead to uneven tire wear and poor handling. Examine the suspension components for wear or damage, and ensure all bolts and fasteners are secure. Test the RV’s stability by driving it on a straight road to detect any wobbling or swaying. Check the chassis for any bends or cracks, especially near the axles or suspension mounts. A compromised frame or chassis can lead to costly repairs and safety hazards. Consult a professional if you suspect any structural issues, as this is critical for the RV’s long-term reliability and performance. A thorough inspection ensures your RV is safe and roadworthy.
Battery and Electrical Components
The battery and electrical systems are vital for powering the RV’s essential functions. Check the battery’s age, charge level, and connections for corrosion or wear. Test the voltage to ensure it’s within the recommended range. Inspect the electrical panel for any signs of damage, overloaded circuits, or faulty breakers. Verify that all lights, appliances, and outlets are functioning properly. Look for frayed wires, loose connections, or signs of rodent damage, which can cause electrical failures. Test the generator if present, ensuring it operates smoothly and provides consistent power. Check the circuit breakers and fuses to ensure they are in good condition. A malfunctioning electrical system can lead to safety hazards, so it’s crucial to address any issues before finalizing the purchase. Consult a professional if you find any electrical problems, as they can pose serious risks if left unaddressed. A reliable electrical system ensures a safe and enjoyable RV experience.
Propane and Gas Systems
Inspecting the propane and gas systems is critical for safety and functionality. Check the propane tank’s condition, looking for rust, dents, or leaks. Ensure the tank is properly secured and the valves are functioning correctly. Inspect the regulator and hoses for any signs of wear, cracks, or damage. Test the gas lines for leaks using a soapy water solution. Operate all propane-powered appliances, such as the stove, refrigerator, and water heater, to confirm they are working efficiently. Check the propane gauge to ensure it’s accurate and functioning. Look for any signs of gas leaks around connections and fittings. A malfunctioning propane system can be hazardous, so it’s essential to address any issues promptly. Ensure all safety devices, such as the propane detector, are installed and operational. A thorough inspection ensures safe and reliable operation of these systems. Always prioritize safety when dealing with propane and gas components.
Brake System Check
The brake system is a critical component of any RV, ensuring safety on the road. Inspect the brake pads, rotors, and calipers for wear or damage; Check the brake fluid level and look for any signs of leaks around the master cylinder or brake lines. Test the parking brake to ensure it holds the RV securely in place. Inspect the condition of the brake hoses and lines, checking for cracks, frays, or blockages. Ensure the ABS (Anti-lock Braking System) is functioning properly if equipped. Test the brakes during a test drive to ensure they engage smoothly and evenly, without pulling to one side. A well-maintained brake system is essential for safe and confident driving. Address any issues promptly to avoid potential hazards on the road.
Suspension and Alignment
Inspecting the suspension and alignment is vital for ensuring a smooth and safe driving experience. Check the shock absorbers, springs, and bushings for any signs of wear or damage. Look for sagging or uneven suspension, which could indicate worn components. Examine the axle and frame for any bends or damage that might affect alignment. Test the RV’s stability by driving on a straight road; any pulling to one side could signal misalignment. Inspect the tires for uneven wear patterns, which often result from improper alignment. If possible, have the alignment checked professionally using specialized equipment. A properly maintained suspension and alignment system ensures better handling, improved safety, and reduced tire wear. Addressing these issues early can prevent costly repairs and enhance overall performance.
Exhaust System Inspection
Inspecting the exhaust system is crucial for ensuring safety and performance; Visually check for any signs of damage, rust, or leaks in the muffler, pipes, and connections. Ensure all components are securely fastened and free from dents or holes. Look for black soot or stains around joints, which may indicate leaks. Test the system by starting the engine and listening for unusual noises, such as rattling or hissing sounds. Check the catalytic converter for proper function and ensure it is not clogged or damaged; If possible, have a professional inspect the system using specialized tools to detect hidden issues. A faulty exhaust system can lead to reduced fuel efficiency, increased emissions, and potential engine damage. Addressing exhaust problems early ensures a safer and more efficient RV experience.

Additional Considerations for Used RV Buyers
When purchasing a used RV, it’s essential to consider factors beyond the inspection; Research the RV’s history, review maintenance records, and assess any needed repairs. Always conduct a test drive to evaluate performance and comfort. Understanding the RV’s past ensures a smarter, more informed purchase decision, helping you avoid future headaches and financial burdens.
Researching the RV’s History
Researching the RV’s history is a critical step in the buying process. Obtain a detailed history report using services like Carfax or RV-specific reports to uncover past accidents, floods, or major repairs. Review ownership history to ensure the RV hasn’t been used for commercial purposes or rented extensively, as this can indicate higher wear and tear. Check for any recalls or safety notices related to the make and model. Inspect service records to verify maintenance has been performed regularly. Compare the RV’s VIN with the report to ensure accuracy. Understanding the RV’s past helps you make an informed decision and avoid purchasing a vehicle with hidden issues. A thorough history check complements your inspection checklist, providing a complete picture of the RV’s condition and value.
Reviewing Maintenance Records
Reviewing maintenance records is a vital part of the used RV buying process. Regular servicing and repairs should be documented to ensure the RV has been properly cared for. Look for records of routine maintenance, such as oil changes, tire rotations, and battery checks, to verify the seller’s commitment to upkeep. Check for any major repairs, like engine overhauls or plumbing fixes, and ensure they were done professionally. Pay attention to dates and mileage to confirm the records align with the RV’s current condition. Ask for receipts and service logs to validate the work. A well-maintained RV is less likely to have hidden issues, making it a more reliable purchase. If records are missing or incomplete, it may indicate neglect or potential problems. Always verify the records with the seller and consider consulting a mechanic for validation. This step ensures you’re investing in a vehicle with a proven history of care and reliability.
Checking for Any Existing Damage
Checking for any existing damage is a critical step in the used RV inspection process. Start with a thorough exterior inspection, looking for dents, rust, or hail damage on the roof and sidewalls. Inspect the paint and decals for fading or peeling, which could indicate age or poor maintenance. Check for water damage around windows, doors, and seams, as leaks can lead to costly repairs. Examine the tires for uneven wear, cracks, or signs of aging. Inside, look for stains or warping on walls and ceilings, which may indicate past leaks or moisture issues. Test all appliances to ensure they function properly. Check for any signs of pest infestation, such as rodent droppings or insect damage. Don’t overlook the condition of brakes and suspension, as these are vital for safety. Any major damage found should be addressed before finalizing the purchase. A detailed inspection ensures you’re aware of the RV’s true condition.
Evaluating the Need for Repairs
Evaluating the need for repairs is a vital part of the used RV inspection process. Start by assessing the exterior for dents, rust, or damaged panels, which may indicate past accidents or neglect. Check the roof for cracks, tears, or worn-out seals that could lead to water damage. Inspect the tires for uneven wear or cracks, as this can affect safety and handling. Inside, look for signs of water damage, such as stains or warped flooring, which can be costly to repair. Test all appliances to ensure they function properly, and check the plumbing system for leaks or corrosion. Don’t overlook the electrical systems; faulty wiring or outlets can pose safety risks. Consider the condition of the engine and transmission, as these are major components. Make a list of needed repairs and prioritize them based on urgency. Consult a professional to estimate repair costs and determine if they align with your budget. This step ensures you’re fully prepared for any potential expenses after purchase.
Negotiating the Purchase Price
Negotiating the purchase price of a used RV requires a strategic approach. Start by leveraging findings from your inspection checklist to highlight any flaws or needed repairs. Research the market value of similar RVs to establish a fair baseline. Itemize necessary repairs and present them to the seller to justify a lower price. Be transparent about your budget but remain flexible to find a mutually agreeable figure. Consider offering a lower price if the seller is motivated or the RV has been on the market for an extended period. Don’t hesitate to walk away if the terms don’t align with your expectations. Once agreed, ensure all terms are documented in the sales contract to avoid disputes. A well-prepared negotiation strategy can save you thousands and ensure a satisfying purchase experience. Stay calm, professional, and assertive to achieve the best possible deal.
Understanding the Importance of Test Drives
A test drive is a crucial step in evaluating a used RV’s performance and comfort. It allows you to assess how the vehicle handles on the road, revealing issues that may not be apparent during a static inspection. Pay attention to acceleration, braking, and maneuverability, as these are critical for safe operation. Check for unusual noises or vibrations, which could indicate underlying mechanical problems. Test the RV’s features, such as heating, cooling, and electrical systems, while driving. Drive on various road types to gauge stability and suspension performance. Don’t hesitate to involve a professional if you’re unsure about any aspect of the drive. A test drive ensures the RV meets your needs and provides a comfortable, safe driving experience. Comparing multiple RVs through test drives can also help you make a more informed decision. Remember, a test drive is your chance to ensure the RV is right for you before finalizing the purchase. Always prioritize this step to avoid post-purchase regrets.
Final Steps in the Inspection Process
After completing the inspection, compile all findings and review them thoroughly. Consult with a professional to address any concerns. Use the results to make an informed decision on your purchase.
Compiling the Inspection Results
Once the inspection is complete, organize all findings into a detailed report. Review each component of the RV, from exterior to interior, and document any issues or needed repairs; Categorize problems by severity to prioritize addressing critical flaws. Include photos and notes for clarity, ensuring a comprehensive record. Summarize the overall condition to help assess the RV’s value and negotiate the price effectively. This structured approach ensures no details are overlooked, providing a clear basis for decision-making; Consider sharing the report with a professional for a second opinion, ensuring confidence in your purchase. A well-compiled report is invaluable for making informed decisions and avoiding future surprises.
Consulting with a Professional
Engaging a professional to review your inspection findings is a wise step. An RV technician or mechanic can provide expert insights, especially for complex systems like electrical, plumbing, and propane. They can verify the severity of issues and offer repair estimates, helping you understand the RV’s true condition. A professional’s opinion adds credibility when negotiating the purchase price or requesting repairs. Don’t hesitate to seek their advice—it’s a small investment compared to potential future costs. Use their feedback to make informed decisions, ensuring your purchase is both reliable and cost-effective. A professional’s input can also highlight overlooked details, giving you peace of mind. This collaboration ensures you’re well-prepared for the responsibilities of RV ownership.
Making an Informed Decision
After completing the inspection and consulting with a professional, it’s time to evaluate the findings. Use the checklist results to assess the RV’s condition and identify any major or minor flaws. Consider the cost of repairs and how they align with your budget. Reflect on the RV’s overall value and whether it meets your needs. If issues are significant, you may need to negotiate the price or reconsider the purchase; Don’t rush the decision—take time to weigh the pros and cons. A well-informed choice ensures you invest in a reliable RV that enhances your travel experiences. Remember, a thorough inspection is your best tool for avoiding future headaches. Trust the process and make a decision that aligns with your priorities and expectations;